Multi Page Application with React
In the world of web development, we can list two main design patterns for the web apps: multi-page application (MPA) and single-page application (SPA).
In this blog post, I will focus on the integration of react library into a multi page app. The classical architecture that requires reloading of a web-page in order to load or send data from/to server in the user’s browser.
What I’m planning to do is to prepare a Webpack configuration that includes React components into a generated static pages (i.e. html files). I will go through the steps of the project creation and setup.
Since a picture, or in this case, some code, is worth a thousand words, here’s an example to illustrate the concept above for an example static page:

Prerequisites lists
This tutorial assumes that you have installed Node with npm:
$ node -v
v10.11.0$ npm -v
6.4.1
Without further ado, let’s create package.json file:
$ npm initNote: Add -y/ — yes flag to skip the questions and use the default values
Now we want to prepare the structure of our project, as below:
├── src
|   ├── components/
|   |   └── Menu.js
|   └── pages/
|       ├── products/
|       |   ├── product-1.js
|       |   └── product-1.html
|       ├── contact.js
|       ├── contact.html
|       ├── index.js
|       └── index.html
├── package.json
└── webpack.config.js
To speed up this process, we can execute this command:
$ touch webpack.config.js && mkdir -p src/components && mkdir -p src/pages/products && touch src/components/Menu.js && touch src/pages/products/product-1.js && touch src/pages/products/product-1.html && touch src/pages/contact.js && touch src/pages/contact.html && touch src/pages/index.js && touch src/pages/index.htmlAlright, so what we see in the pages directory is a bunch of js and html files with the same filename. This filename is a cue for webpack to link the appropriate js file to html file. For example, for pair index.html and index.js files, webpack generates index.html file that includes index.js file which, in turn import React components. Before I dig into webpack configuration, let’s write some code in those empty files.
First, let’s define Menu component:
Second, in index.js, place the following code that will import Menu component created in the previous step:
Lastly, edit index.html file where <Menu> react component will be rendered:
The most interesting part of the html file is the <div> tag with an id HTML attribute “menu” inside which the Menu component will be placed.
Before this is done, we need to set up some tools, like a bundler and development server, which will help us do this.
Install dependencies
For the project, we will install webpack module bundler, webpack-cli to use webpack in the command line (i.e. inside package.json file), html-webpack-plugin to generate html files that includes all webpack bundles and webpack-dev-server as a development server that provides live reloading:
$ npm i webpack webpack-cli webpack-dev-server html-webpack-plugin --save-devNext we install react and react-dom (which is a glue between React and the DOM allowing it to render component and access the DOM):
$ npm i react react-dom --saveAlong with React we need to install babel plugins which add support for ES6 and JSX :
$ npm i @babel/core @babel/preset-env @babel/preset-react babel-loader --save-devWhen we’ve got it installed, we can add build and start scripts to package.json:
{
   "name": "multi-page-app-with-react",
   "version": "1.0.0",
   "description": "Multi Page Application with React",
   "main": "index.js",
   "scripts": {
      "build": "webpack — mode production",
      "start": "webpack-dev-server — mode development — hot — open — port 3100"
   }
   "keywords": [],
   "author": "",
   "license": "ISC"
}
build script runs in production mode to improve load time (i.e. minified code, lighter weight source maps, etc…)
start script runs the server in development mode with hot module replacement and opens the browser after the server has been started.
But before we run any of these script we need to edit and setup webpack.config.js file.
Webpack configuration
First of all, we want to define entry point by configuring the entry property in webpack.comfig.js file. We want to tell Webpack to use exactly one entry point for each page. This is possible by passing object with defined entryChunkName key and the path to js file as a value:
module.exports = {
  entry: {
    'index' : './src/index.js',
    'products/product-1': './src/pages/products/product-1.js',
    'contact' : './src/pages/contact.js'
  }
};
Obviously, we don’t want to hard code it like above because whenever we add a new page, this configuration has to be updated. The desired solution is to find all .js files in the “pages” directory and generate an object with entry points based on the findings.
In order to do that, we will implement getFilesFromDir function in files.js:
Then we can import and replace entry property with the modified result of getFilesFromDir function:
const path = require("path");
const getFilesFromDir = require("./config/files");
const PAGE_DIR = path.join("src", "pages", path.sep);const jsFiles = getFilesFromDir(PAGE_DIR, [".js"]);
const entry = jsFiles.reduce( (obj, filePath) => {
   const entryChunkName = filePath.replace(path.extname(filePath), "").replace(PAGE_DIR, "");
   obj[entryChunkName] = `./${filePath}`;
   return obj;
}, {});module.exports = {
  entry: entry
};
Note: final version of webpack.config.js file can be found below (see gist file).
When the entry point is set, we can jump into the configuration of the html-webpack-plugin part. The main goal of this plugin is to generate an html file (in the dist folder), including corresponding javascript file. For instance, if we have generated a contact page, we expect to have contact.html with contact.js file included inside the <body> by <script> tags. At a minimum, we want to provide three configuration options:
plugins:[
  new HtmlWebPackPlugin({
    chunks:["contact", "vendor"],
    template: "src/pages/contact.html",
    filename: "contact.html"
})]
The chunks property defines codebase included into the template file via <script> tags and generates html file named filename as an output.
As we want to split vendor (i.e. 3rd party libraries) and app code into separate bundles, we have to add “vendor” element to the chunks table. I will write more about it when discussing the optimisation.
This plugin config is correct, but if we would like to follow this construction, we would have to hard-code creation of HtmlWebPackPlugin object for each html file. We don’t want to do that for the same reason as for the entry points definition. That’s why we will use getFileFromDir function again, but this time we will search only html files:
const HtmlWebPackPlugin = require("html-webpack-plugin");
const htmlFiles = getFilesFromDir(PAGE_DIR, [".html"]);const htmlPlugins = htmlFiles.map( filePath => {
  const fileName = filePath.replace(PAGE_DIR, "");
  return new HtmlWebPackPlugin({
    chunks:[fileName.replace(path.extname(fileName), ""), "vendor"],
    template: filePath,
    filename: fileName})
});module.exports = {
  entry: entry,
  plugins: [...htmlPlugins]
};
In order to import modules more easily we can also alias commonly used “components” and “src” folders by setting up alias for module resolver:
module.exports = {
  entry: entry,
  plugins: [...htmlPlugins],
  resolve:{
     alias:{
        src: path.resolve(__dirname, "src"),
        components: path.resolve(__dirname, "src", "components")
     }
  },
};
Now Webpack will use this alias when resolving module imports like the following:
import Menu from "components/Menu";Instead of default import mechanism that is sensitive to changes in file location i.e.:
import Menu from "../../components/Menu";Last but not least, we have to set babel-loader to make React work (i.e. transpile ES6 into ES5 code and JSX into javascript):
module.exports = {
   // put previously defined properties here (entry, plugins etc)
   module: {
      rules: [{
         test: /\.js$/,
         exclude: /node_modules/,
         use: {
            loader:”babel-loader”,
               options:{
                  presets: [
                     “@babel/preset-env”,
                     “@babel/preset-react”
                  ]
               }
         }
      }]
   },
}
Note: alternatively presets can be put into .babelrc file
Finally, we can build project:
$ npm run buildAnd voilà! If everything went fine, we should see dist directory with html and js files generated on the base of “pages” folder.
However, there is still one problem with our js files. If you edit any of them, you will see that they include an app and third party source code (i.e. React with other libs).

And this generates two problems:
- One giant file means that the user must download that entire file again when we change one line of code
- The same third party source code is included and downloaded for each js file. I mean index.js, contact.js and product-1.js files include the same React code.
The solution to that issue is splitting out 3rd party libs into a separate vendor.js file. So let’s split our packages into a separate file by using splitChunksPlugin that became a default solution for code splitting in Webpack4.
module.exports = {
   // put previously defined properties here (entry, plugins etc)
   optimization: {
      splitChunks: {
         cacheGroups: {
            vendor: {
               test: /node_modules/,
               chunks: "initial",
               name: "vendor",
               enforce: true
            }
         }
      }
   }
}
Here’s what the final webpack.config.js file looks like after all the changes:
Now we can build our app again:
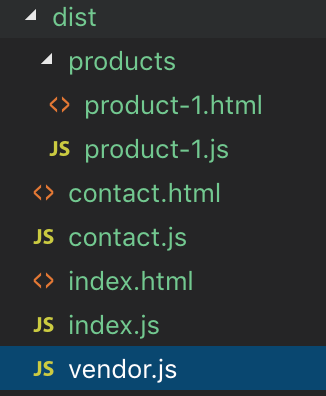
$ npm run buildBut this time when build is done, we will see new vendor.js file inside the dist folder. This file contains only 3rd party source code, other *.js files visible in the picture should be free from this code now.
When we’ve got all of those elements ready, we can finally run project in the development mode by entering:
$ npm startWhat are the next steps?
As we all know, there is always room for improvement, so we could easily extend this config about the CSS/SCSS loaders, add linter, hashes to .js filenames (for cache invalidation purposes) and do many other cool things. For anyone who wants a clone of this config with mentioned improvements, I have prepared this github repository.
