How to Monitor and Track Errors in Your Apps with Sentry (Angular)

Imagine that you just finished and shipped your amazing app. Are you sure if it’s error-proof? Customers may suffer from an error which you never know of, and they are screaming in vain. This is total chaos — I’m being a little bit dramatic here.
However, if you don’t know of and fix the error, your business will definitely lose customers. Without a proper error tracking system, you will never know why. Customers won’t even bother to let you know. They just close it and use other services.
In this article, I will show you how to set up a tracking system for your Angular app with Sentry — an open-source and hosted error monitoring that helps all software teams discover, triage, and prioritize errors in real-time.
Step 1: You will need an account from Sentry (Free for Developer)
It’s straight forward, and there's a wide range of frameworks and languages that Sentry supports.

When you click on your choice of languages, you will see a guide that helps to set your system up.

Step 2: Add Sentry to Your Project (Angular)
Install Sentry through NPM
npm install @sentry/browser
npm install @sentry/integrations
Then add initiate Sentry on your app.module.ts. The release will help you to connect with Github commits. The RewriteFrames configuration will help Sentry to link stack traces with correct source files if you’re using TypeScript.
// app.module.tsimport * as Sentry from '@sentry/browser'
import { RewriteFrames } from '@sentry/integrations'Sentry.init({
  dsn: <your-sentry-dsn>,
  release: <should be the same with the deployed code>,
  integrations: [
    new RewriteFrames(),
  ],
})@Injectable()
export class SentryErrorHandler implements ErrorHandler {
  constructor() {}
  handleError(error) {
    Sentry.captureException(error.originalError || error);
    console.error(error)
  }
}@NgModule({
  providers: [{ provide: ErrorHandler, useClass: SentryErrorHandler }]
})
Step 3: Test the Configuration
The configuration can be tested locally. What you need to do is to call un unidentified function in your code and run it.
myUndefinedFunction()
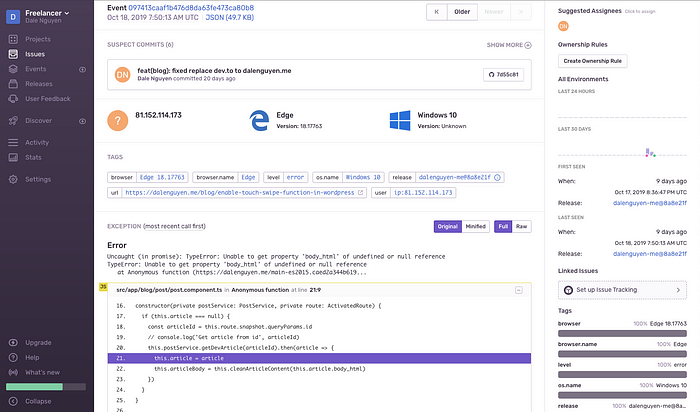
You will get an email notification about the error, and you can check it on the Sentry dashboard.

It means that from now if there is something wrong when customers interact with your app, you will know about it.
Step 4: Create a Release
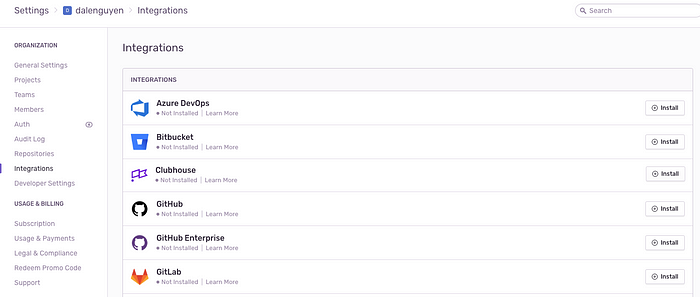
A release is a version of your code that is deployed to an environment. You should read more about this on the Sentry platform. Before creating a release, you should integrate Sentry with your Git repository.

I prepared a script that you can use to deploy a release to Sentry after you finish your development.
// sentry-deploy.sh#!/bin/sh
export SENTRY_AUTH_TOKEN=xxx
export SENTRY_ORG=dalenguyen
export SENTRY_PROJECT=dalenguyen-me# Version from git
REVISION=$(git rev-parse --short HEAD)sentry-cli releases new -p $SENTRY_PROJECT "$SENTRY_PROJECT@$REVISION"sentry-cli releases set-commits "$SENTRY_PROJECT@$REVISION" --auto# Upload source maps
sentry-cli releases files "$SENTRY_PROJECT@$REVISION" upload-sourcemaps ./dist --rewrite# Finalize
sentry-cli releases finalize "$SENTRY_PROJECT@$REVISION"
Remember the release in the app.module.ts, it should the same with sentry-deploy.sh. You can get the revision by running:
git rev-parse --short HEADThe source maps uploading is really important because in production your assets are minified. It would be extremely hard to debug your error when looking at a minified JavaScript code.
So if you have your source maps ready, you will know which line of code causes the issue.

If you have any questions or suggestions please leave a comment. Hope this helps ;)

