The Ultimate Guide to Elasticsearch in Laravel Application

Starting with a new technology can be overwhelming. Especially, when it’s as complex as Elasticsearch. The best knowledge source in this case is the official documentation , but quite often it doesn’t answer the questions, which are important for you: where to start? how to run the software on my local machine? how can I integrate it with my beloved framework?
Moreover, sometimes we just can’t invest so much time in studying a new technology. We have tight deadlines, another topics to focus on and all we want is a quick start. Under these circumstances, a guide dedicated to the topic of your interest might be your best bet. And this is what this article is all about: it guides you through the steps you need to take to build a custom search engine based on Elasticsearch in your Laravel project.
You can find answers to the following questions in this article:
- How can I setup a development environment, which includes: PHP, a database, a HTTP-server and Elasticsearch in no time?
- How can I create an Elasticsearch index and share the schema with my teammates?
- How can I customize the data indexed by Elasticsearch?
- How can I make a search request using mini-language syntax?
- How can I make a bool query?
- How can I build a custom search request builder?
All the answers are given in a “how to” manner and are accompanied with examples.
Laradock
The development of a new project is often preceded by installing and configuring all the necessary software, which allows you to run the code locally on your machine. I will be referring to it as the development environment in the future.
The main purpose of the development environment is to test our code and see how it actually works before we publish it on production or other environments. The software stack, which is commonly used to run a Laravel application is: PHP, PHP-FPM, Nginx, MySql and in our case — Elasticsearch.
There are number of ways to run this software locally: you can use virtual machines, Docker containers or install the stack directly on your computer. In this article we will stick to Docker as it’s the most popular choice of developers these days.
Luckily, we don’t need to create Docker images from scratch as there is an existing solution, which perfectly fits our needs — Laradock. To get started with Laradock you need to clone the repository to a directory of your choice:
The result folder structure should look like this:
To configure Laradock, switch to the laradock folder and copy env-example to .env:
Open the .env file and set the code path variable to your application directory as shown below:
If you want to dive deeper in the available configuration options and possibilities of Laradock, please check the official documentation. For our use case we can keep the rest of the configuration as it is and already start the necessary containers in the background:
Laravel Application
Let’s create a small demo application to see how Laravel has to be configured within the Laradock environment and to have some playground for the next sections:
When the fresh Laravel installation is ready, we need to change MySql settings in the .env file to be compatible with the Laradock default configuration:
Every Laravel installation comes with predefined User model, UserFactory and the related migration. We can make use of it to populate our demo application with some data. The only missing thing is UsersTableSeeder, which can be created using an Artisan command:
UsersTableSeeder can be found in the Laravel’s database/seeds folder. To make use of the seeder, we need to define the run method:
Don’t forget to enable the seeder in database/seeds/DatabaseSeeder.php by uncommenting the related line:
Finally, run migrations with the seed option inside the workspace container:
Elastic Migrations
We have already created a database and the users table, now it’s time to create an Elasticsearch index to store search engine data. An index is like a table in a relational database. It has a mapping, which defines the field types.
How can we create one? To answer this question, let’s think of the way we create database tables in a Laravel application. What is the common approach? Of course, the database migrations!
Luckily, we have Elastic Migrations library, which provides an interface similar to Laravel’s migrations, but allows you to manipulate Elasticsearch indices instead of relational database tables.
Let’s install the library using Composer:
Elastic Migrations uses Elastic Client as a dependency. It means, that we need to configure the client in the .env file before we can execute a migration:
Also don’t forget to run Laravel migrations, because Elastic Migrations uses a database table to store meta information:
To make a migration file, we can use an Artisan command:
The command will create a stub file in the elastic/migrations folder. Let’s open the file with create_users_index suffix and modify it as follows:
As you can see above, we’ve added only two fields in the users index: name and email. name field is of text type, which is analyzed by Elasticsearch and can be used in full text queries. email is a keyword, it is not analyzed and mainly used for filtering.
There are many helpers in your disposal when writing an Elasticsearch migration: create, putMapping, putSettings, drop and more. We can’t cover all of them in this guide, so please refer to the project page for more details.
As migration is ready we can execute it with a help of elastic:migrate command:
The next step is to index the user data, but before we do that, let’s briefly talk about Laravel Scout in the next section.
Elastic Scout Driver
When it comes to full-text search in your application, Laravel has something to offer. I’m talking about Laravel Scout, which can make your Eloquent models to be searchable. Scout automatically keeps the search indices in sync with the database records.
Scout is flexible: you can use any engine of your choice under the hood (Algolia, Elasticsearch, database, etc.). Unfortunately, it’s shipped with only one driver out of the box— Algolia. But it’s not a problem as it’s quite easy to write your own driver or better choose the one, already created by community.
Scout is not included in the default Laravel installation, so use Composer to add it in your application:
After installing the library you need to publish its configs:
There are plenty of Elasticsearch Scout drivers, but we will dwell on babenkoivan/elastic-scout-driver:
You can enable the driver by setting SCOUT_DRIVER variable in .env file:
Note, that Elastic Scout Driver uses the same client dependency as Elastic Migrations, therefore we don’t need to configure Elasticsearch connection this time.
Now it’s time to configure our User model. First, we need to enable the search capabilities by adding the Searchable trait:
Second, let’s restrict the fields, which are indexed by Elasticsearch as we don’t want password and useless information to be stored in our search engine:
Finally, as all preparations are done, we are ready to import the demo data in Elasticsearch:
Note, that you only need to import an existing data for the first time. All the new database records will be automatically synced with Elasticsearch.
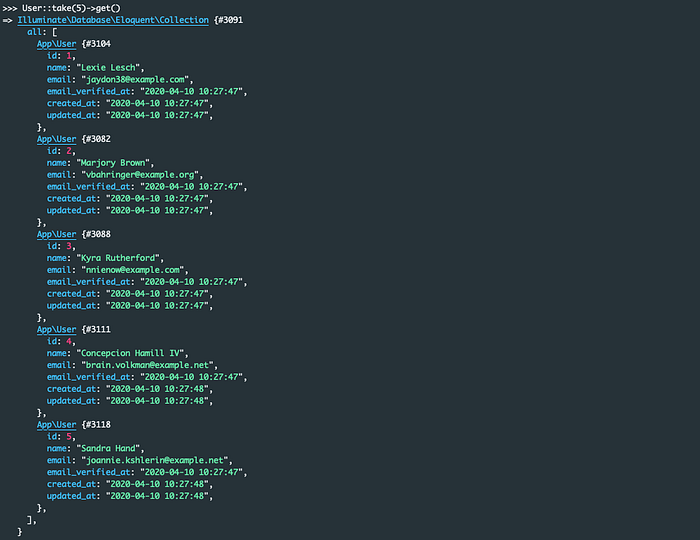
When records are imported, we can open Tinker and fetch few users from the database to have an idea what can we search for:
Let’s try to find a user stored in Elasticsearch. How about Kyra Rutherford?

Elastic Scout Driver supports mini-language syntax, which means you can do more complex queries. For example, what if we don’t remember the exact name:

Or maybe we don’t know the name at all, but we do have an email address:

As you can see, Elastic Scout Driver is quite powerful out of the box, but if you want more flexibility or miss some Elasticsearch specific features, check out the next section in which we will talk about Elastic Scout Driver Plus.
Elastic Scout Driver Plus
Elastic Scout Driver is great, but as it works in the Scout boundaries, it’s quite limited. It doesn’t expose Elasticsearch specific features, because it would break compatibility with other drivers.
This issue is solved by Elastic Scout Driver Plus, which brings cool new features like bool queries, highlighting and more. If you don’t plan to switch between different Scout drivers in your project and would rather stick to Elasticsearch, I recommend you to install it:
To enable the Elastic Scout Driver Plus features add the CustomSearch trait in your model:
There is nothing else you need to configure to make it working. Let’s switch to Tinker and try it out:

In the example above we made a bool query, which searches for a user with name Leixe and highlights the results. Unfortunately, we have a typo in the name, but it’s not a problem when fuzziness is enabled.
Unlike Elastic Scout Driver, the Plus version returns a SearchResult object instead of model collection. It gives you much more flexibility. For example, if you don’t need models and want to avoid additional database queries, you can just retrieve the documents:

It’s also possible to get related document, model and highlight via matches:
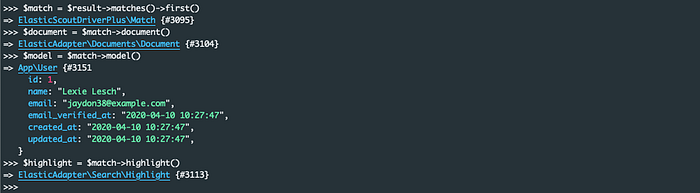
Highlight is an object, which provides an access to the snippets noted by Elasticsearch:

Document is an object, which stores searchable data:

And there is no need to explain what model means, just keep in mind, that SearchResult loads models only when you ask for it, so you don’t need to be concerned about the database overload.
There is so much more Elastic Scout Driver Plus can offer, it’s not possible to cover everything in one article. If you want more usage examples, check the library documentation.
I want to close this article by introducing you one very important Elastic Scout Driver Plus feature — custom query builders.
Imagine, there is a form on your website, which allows you to search for users. Instead of using generic query builders in the backend, you can create a custom one with more intuitive interface:
The query builder constructs a payload, which is sent to Elasticsearch as a part of a search request (along with the pagination, the highlight rules, etc.). To make use of SearchFormQueryBuilder, we need to add a new method in our model:
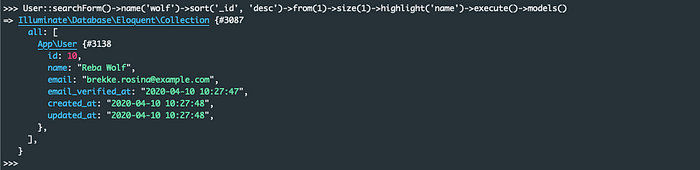
Now we can do more transparent and clean queries. Check this out:

Of course, you can still use pagination, highlighting and sorting:
I hope this guide will help some of you to get started with Elasticsearch and Laravel. Thank you for reading and don’t hesitate to leave a comment below if you have any question 🙂

